I picked up this Vera Bradley back pack for $1 a few weeks ago when I was out
yard sale shopping with a friend. It was in pretty rough shape though.
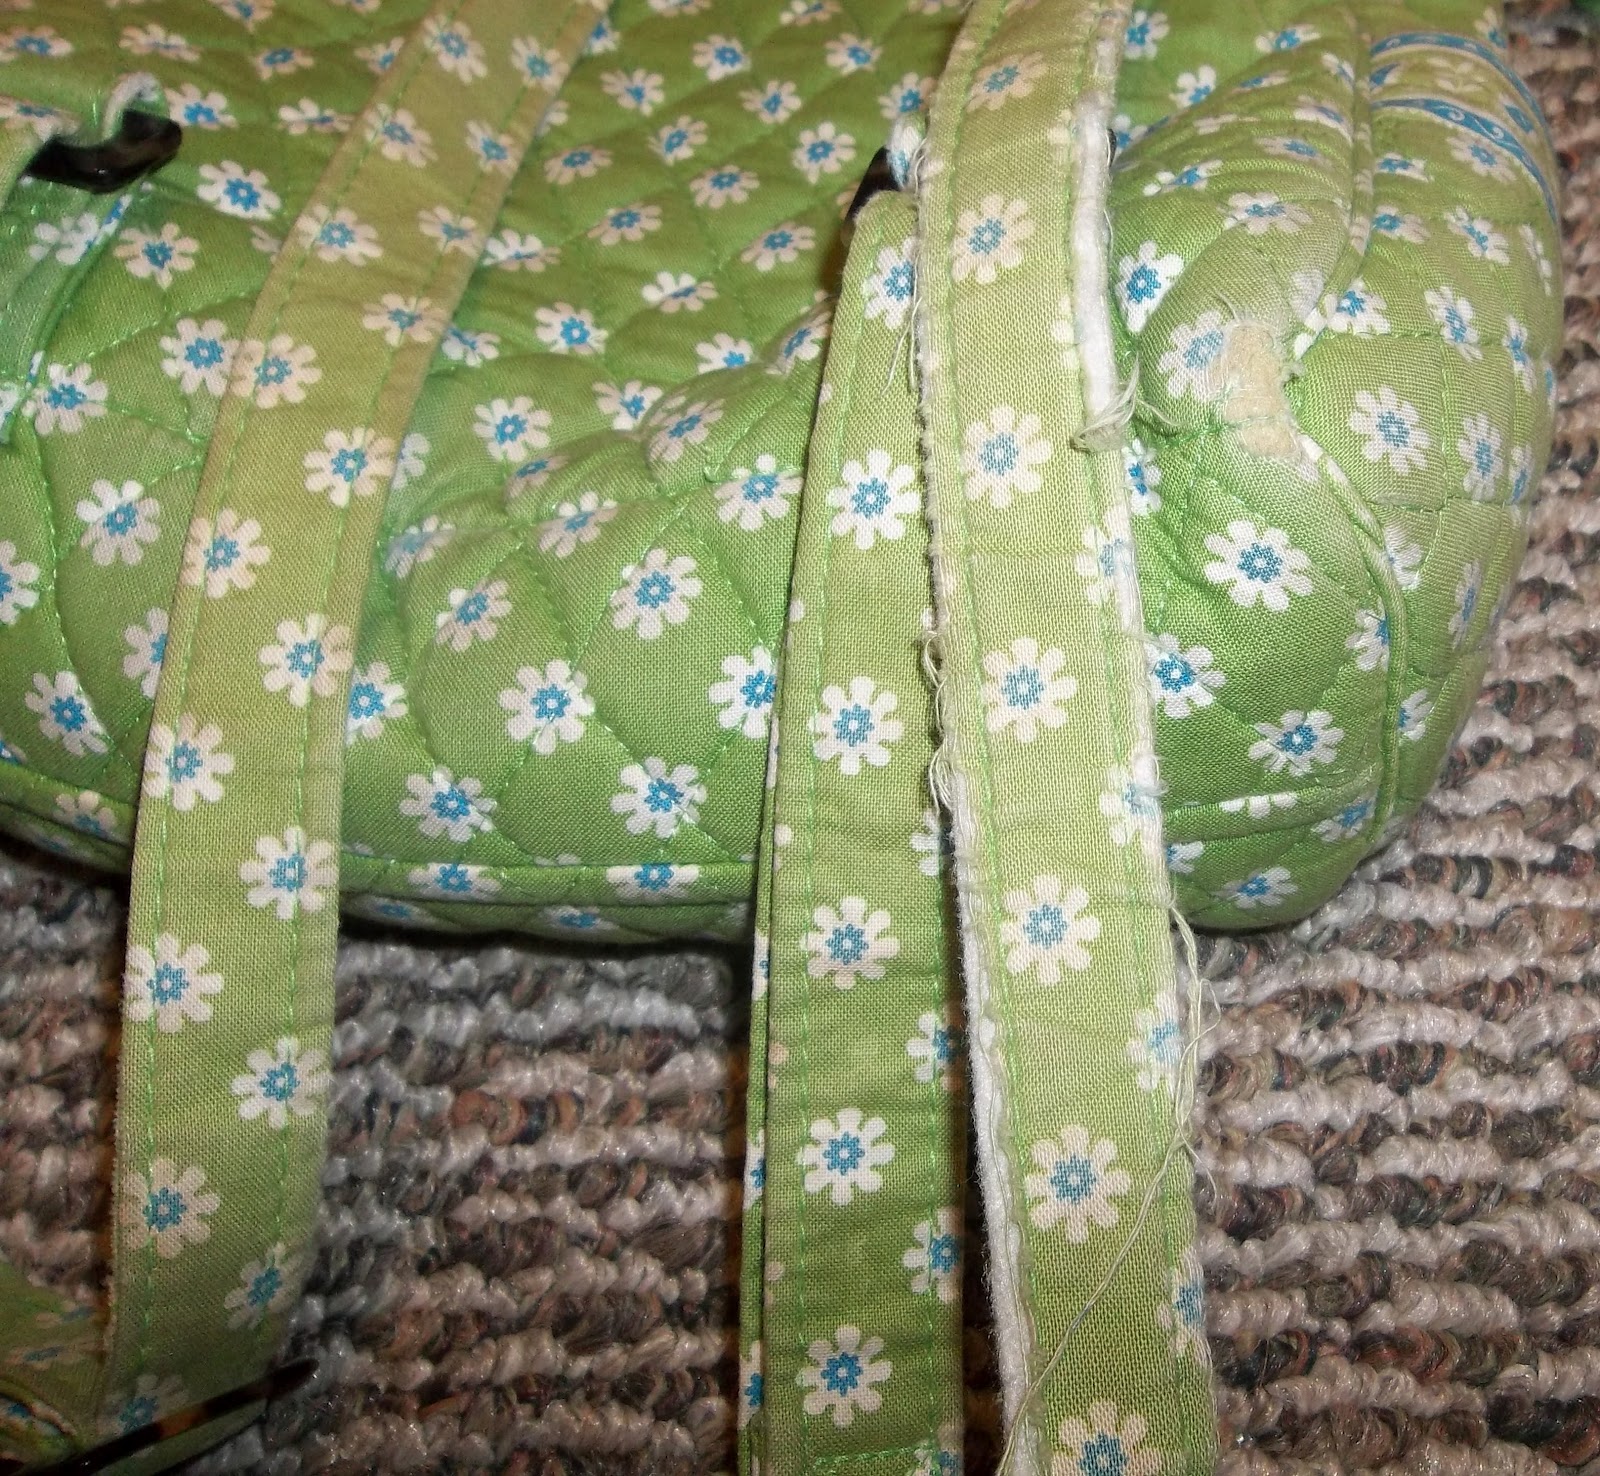
Check out these straps!
It seemed like it was very well loved (there was a young teen girl at the sale that I am guessing took it to school every day) but for a dollar I thought I could at least try to fix it. I started by Googling "How to wash a Vera Bradley Bag" and actually found quite a few results. All the articles said that they were machine washable so I knew that would make the process a lot easier. I couldn't tell if the bag was faded or just really dirty so I got out my favorite Dollar Tree stain spray. It works AMAZINGLY well for just a buck! I heavily sprayed down the entire bag.
I tossed it in the dryer for about half an hour and then let it air dry the rest of the way. Next, I got out the scissors and trimmed off all the strings that were hanging off. Then I dug into my ribbon box to find something to cover the straps with. They were just too frayed to leave as-is. I ended up choosing this amazing vintage lace that I had grabbed out of my grandmother's craft stash.
I started by adjusting the length of the straps to where I liked them best because once I was finished, they would not be able to move. I wrapped the lace around the top of the of the strap and pinned it down and then started hand sewing it in place.
Once the top was secured I wrapped the ribbon around the strap so that it over-lapped in the back and pinned it and sewed it down as well.
The ribbon had a more open section down the middle which was almost exactly the same width as the straps so that the color and pattern of the bag were still visible. It was a nice effect. I repeated the process on the other strap and then it was time to move on the the front. There were a few obvious thread bare patches near the zipper and I wanted to cover those up so I pulled out some buttons.
I needed three in a row so I played around with the configuration until I found one that I like and then sewed them down.
I may end up taking off the daisy one and replacing it with another plain white one.
At this point the look of the bag was improved immensely, but it just needed one more thing: a hand made flower! I safety-pinned it on so that I could change it up later if I want to. You can learn how to make it
with my tutorial here.
I was really pleased with the outcome. I really like Vera bags and this was a great way to add another one to my wardrobe!


No comments:
Post a Comment
I would love to know what you think or see pictures of anything you make from what you see here!