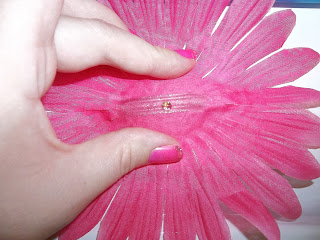
Greetings Internet! This is the inaugural post of a blog that has been in my head for a long time! I love to craft and cook and do things on a budget and I have been wanting to write about it for a long time, I just never did. So here goes! I have an addiction to Pinterest (like most women my age) and I have a board with about 40 something pins that I have tried. Many of my posts will be dedicated to chronicling the results of attempting those pins and others as I try them. I also am avowing to start getting pictorial evidence of my conquests as I know that I always enjoy seeing things in pictures! So with that in mind, on to the first tutorial. I have made close to 100 of these fake flower hair clips and if you have never tried them, they are super easy!
You will need 4 things:
1. A fake flower - I like to get them from the dollar store or Wal-mart but you can also find them at craft stores, however, they will just be a lot more expensive. If you see one that you cannot resist, wait for a sale or try to get a coupon. Personally I cannot stomach spending $6-12 on one. I was very excited when I found these slightly higher quality ones at the Dollar Tree. They were $1 each and I can usually get several for that amount but I was willing to pay it for these. They are big, like as big as my daughter's head. I think they are going to look adorable! If you are going to get the cheap ones, look for flowers with a lot of layers as they will come out looking a lot fuller.
2. Some kind of hair clip/headband - Generally I like to put flowers on alligator clips but these were so big I opted for a barrette. I recently found a great deal on Alligator clips at Sally Beauty Supply. 100 clips for $6.39. I was paying between $2-3 for around 12 so that is a great deal!
3. A hot glue gun - When I first attempted to make these I would actually sew the flower to the clip. Don't do that. It's really stupid. Buy a glue gun at Wal-mart for around $5 for the gun and the glue.
4. Something for the center of your flower - In this case I will be using part of the original middle from the fake flower itself.
The first thing you will want to do is disassemble your flower. Four layers will make a nice full hair clip. Anything less may not look quite as nice if they are made of very thin fabric. Save the center. If you are making a Gerber Daisy like the one I am making, I have found that you either need a very large gem or a button, OR the fuzzy part of the center usually looks really nice. This is not the case with all fake flowers. For most others I would recommend a button or fake gem.
If the original center of your flower is in multiple parts, discard all but the fuzzy center piece (unless you like the rest of it, I don't) and remove the stem.
Next, glue the layers of your flower down one by one. Make sure that they are facing the right direction before you stick them to the glue. I made the mistake of gluing one on backwards once and it wasn't the end of the world but it didn't look as good as it could have. I like to use the hole in the middle as a guide for where the next layer should go. Also, if I have two layers that are the same size, I like to turn the second one slightly so that it looks fuller. When I get to the last layer before the center, instead of adding more glue, I smooth the fabric over the glue so that the excess glue come through the hole and use that glue to attach my center so I know that it is perfectly in the middle.
Then just set it aside and let it dry for a minute or two and you are done! I included the next two pictures just to give you some perspective of just how big this thing is! If I ever go to the Kentucky Derby or Prince Harry's wedding, I'll have a fascinator!
My daughter looked pretty cute in them but they may be something she has to grow into!


No comments:
Post a Comment
I would love to know what you think or see pictures of anything you make from what you see here!